
In the first photo is a clay mold covered with plastic wrap (to keep mache paste from sticking to the clay - also helps speed drying time) that I used to create a skelton mask for my son Sam's halloween costume.
Once the plastic wrap is placed on the plasticine mold, tear newspaper into strips approximately 1" x 6". For areas with fine detail, you may want to use smaller pieces. It is important that the strips are torn and not cut with scissors for the fibers to bond.
After newspaper is torn, prepare the mache paste (see below). Paste can be refrigerated for 1-3 days if needed.
RECIPE
1 c. flour
1 c. corn starch
2 tbsp salt
2 c. water (more or less. use to desired consistency)
1 c. white glue
a few drops of either spearmint oil or clove oil
Mix and add water if needed. Consistency should be like apple sauce.
 To remove the papier mache from the mold (for plasticine. If using balloon, simply pop the balloon), you may need to cut away part of the mache and then reattach it. For instance, for the skeleton as the mask covers the face as well as the back of the head, I used an exacto knife and cut along the temple across the top of the skull to the other side and then removed the front and back piece (see photo #2).
 If mache needed to be cut from the mold, attach front and back together using more mache strips as used in original construction. Trim rough edges and then apply 1-2 coats of gesso (http://www.amazon.com/s/ref=nb_sb_noss_1/180-8747087-3669869?url=search-alias%3Daps&field-keywords=gesso or www.dickblick.com). Let dry a few hours and then decorate using your favorite paints, fabrics, feathers, etc.
 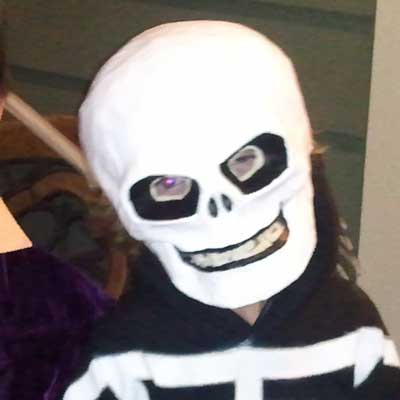 For the skeleton mask, I used acrylic paint with glow powder mixed in with acrylic gloss medium for detail line work around the eye sockets and mouth/teeth. Additional papier mache projects (masks/theater props) can be seen on my website here.
No comments:
Post a Comment